There are two way you can go when painting your cabinets: using materials purchased at home improvement stores or buying all-in-one surfacing kits made especially for cabinets.
Assemble Materials Yourself:
These 100% acrylic or oil-based paints are your main ingredients for painting cabinets yourself. Since this project entails a significant amount of prep work, you will also need stripping and cleaning materials like TSP, sandpaper, tack cloth, primer, putty knife and so on. This process involves cleaning the kitchen cabinets with warm water and detergent, sanding, priming with a brush and then either brushing on the paint or using a high-volume, low-pressure (HVLP) paint sprayer.
Kit: Kits have a distinct advantage because they include most (but not all) of the correct materials you need. But kits tend to be expensive–often, more expensive than the sum of their parts. Cabinet Transformations from Rustoleum is a multi-stage process that lets you paint wood, melamine and laminate cabinets. This is a four-step process: deglosser, bond coat, glaze and top coat.
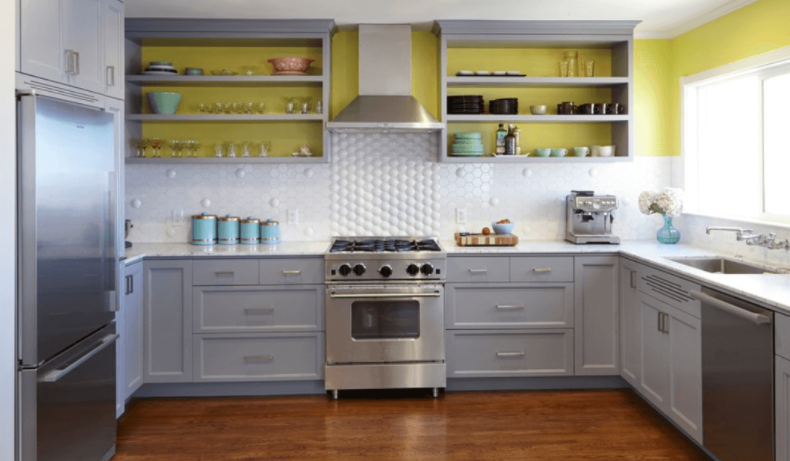
Painting cabinets is necessary to any cost-effective bathroom revival project. Given the steep cost of new cabinets, homeowners who detest painting start to entertain the thought as soon as they receive giant estimates for new cabinets.
What to Expect
Multi-Component: Each cabinet is composed of many pieces–shelves, shelf brackets, fixtures, hinges. Every piece must be removed.
Fixes Appearance, Not Function: Painting will not solve the problems of poorly functioning cabinets: balky drawers, misaligned doors, warped boxes, etc. New cabinets solve those problems in one fell swoop.
Insides: What do you plan to do with the insides of the boxes? Leave as-is? Paint?
Cabinet Disintegration: It is easier to paint cabinets when they are removed and placed on a sawhorse. Yet removal often causes older cabinets to disintegrate. Sink base cabinets especially tend to experience years of slow water damage and rot.
1. Clearing Cabinets and Masking
Clearing: Remove all objects from the cabinets and drawers. Spread a drop cloth or drop cloths around the work area to avoid getting paint on your floors. Also, apply masking or painters tape to any surface (such as countertops where they join the cabinets) that you don’t want to get paint on.
Labeling: Place a small piece of masking tape on the interior of each cabinet door and drawer. Number each piece or identify it in way that will help you remember which cabinet the door or drawer was removed from. Do not use too much pressure when applying the tape; you will need to move it as you prime and paint each side of the door or drawer.
2. Remove Fixtures
Use a screwdriver or reversible drill to remove the doors and hinges from the cabinets. Remove hinges, knobs and pulls from the cabinet doors and drawers. You might consider replacing all of the hardware during the project to give your cabinets a truly fresh appearance.
3. Cleaning, Filling, and Sanding
Cleaning: Old cabinets can have so much built-up grease, fingerprints, dust, and muck over the years, that it is difficult to clean them down properly. TSP (trisodium phosphate) is a white powder you mix with lukewarm water, which helps to cut the grease. Vigorous scrubbing with TSP can give your cabinets a clean surface for painting.
Filling: Inspect the cabinet bases, doors and drawers for nicks and dings. Use a putty knife and putty to repair any damage. Smooth the putty with the knife and allow it to dry, then sand it smooth.
Sanding: Lightly sand the outside of the cabinets as well as the doors and drawer fronts. Use medium- to fine-grit sandpaper. This will help the primer and paint adhere to the surface. Wipe down the surfaces with a damp cloth to remove dust. For a really clean surface, use tack cloth
4. Paint the First Coat
Paint each door and drawer front with primer using a sprayer, roller or brush. A sprayer, which you can rent at some hardware stores, works best for this job. If you use a brush, paint with long, smooth, even motions so the brushstrokes are not visible. Do not forget to paint the edges of the cabinet doors. Allow the primer to fully dry before proceeding.
Turn the cabinet doors over so you can prime the unfinished sides. Apply primer and go over the edges a second time. Allow the primer to dry.
Apply paint to the cabinet doors. If you are using latex paint, use a synthetic paintbrush or sprayer. Oil-based paints require a natural-bristle brush or sprayer. Do not forget to paint both sides of the doors, but allow the front to dry before painting the back. Paint the cabinet bases and drawer fronts and allow the paint to dry.
5. Paint the Second Coat
Apply a second coat of paint to all surfaces and allow it to dry. Reattach the old hardware or attach the new hardware. Attach the doors to the cabinet bases and reattach the drawer fronts if necessary. Slide the drawers back in.